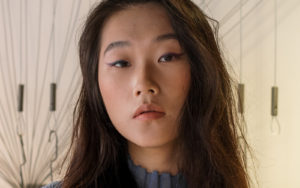
Professional Advice for the Best Blush Ever Application
What is the trick to getting that cozy, lit-from-within glow? The ideal flush. But when it comes to this necessary for beauty, there is no one size fits all, just as with the majority of cosmetic products. Your face shape, skin tone, and skin type—as well as your sense of fashion—determine the perfect blush for you. Because, despite what anybody may tell you, wearing makeup is a personal choice, and having fun with it requires creativity.
But it’s always crucial to grasp the fundamentals before experimenting with the newest trend or trying out new blush hues. Let’s learn how to quickly get warm, rosy cheeks by reading on.
Instructions for properly applying blush
Step 1
Choose the formulation that will best suit your skin type
Each of the various kinds of blush (powder, cream, gels, liquid, etc.) is best suited for a certain skin type, but there is some overlap, of course. Creams and liquids are preferred blush formulations since they easily mix with other makeup and dissolve into the skin.
However, cream blushes may slip off your face or make your skin more oilier if you have oily skin. Powder formulations may be the way forward instead. The converse may be true for skin types with dry skin: powder formulations may highlight dryness while cream and liquid formulas may somewhat hydrate the skin.
Cream blushes may slip off your face or make your skin more oilier if you have oily skin. Powder formulations may be the way forward instead. The converse may be true for skin types with dry skin: powder formulations may highlight dryness while cream and liquid formulas may somewhat hydrate the skin.
Step 2
Find the ideal color for your skin tone in
Finding the ideal shade will come once you’ve decided on the formula type to employ. Look to see what color you naturally “flush” like at the gym or when you go for a run, as a good place to start. Pay attention to this hue and attempt to imitate it by locating a blush color that is comparable.
A cool, pastel pink is typically a nice option if you have fair skin. You could want to try a blush in a neutral shade of pink or peach for medium complexion tones. Peach and rose tones often look lovely on olive skin. Warm reds, corals, and even hot pink colors look stunning on medium to dark complexion tones.
Make sure the undertones of your selected shade also match the undertone of your skin to ensure that it appears extra natural on the skin (cool, warm, or neutral). Go here for our advice on how to identify your undertones if you’re unsure of what shade of undertone you have.
Step 3
Select the proper tool
Make sure you have the appropriate instruments on hand after you have the ideal blush recipe in your possession. When using a fluffy, angled blush brush, like the MODA® BRUSH Neon Angle Contour/Blush Brush, powder blush often looks its best. Try blending with your fingertips with a cosmetic sponge like the ORIGINAL BEAUTYBLENDER Makeup Sponge if you’re using a cream blush or liquid blush. If cosmetic brushes are your thing, you may use them for both cream and liquid formulations. For a better mix, just be sure you use synthetic bristles.
Step 4
Fill the product up
You now have everything you need, so submit your application. Start by giving the blush compact a quick spin with the brush if you’re applying powder blush. Use a liquid blush, such as the YC COLLECTION Liquid Blush, on the skin by delicately dabbing the product there. Recall that little is more. You may always go back in and add more layers to make your blush seem stronger.
Step 5
Apply blush in a manner that accentuates the features of your face
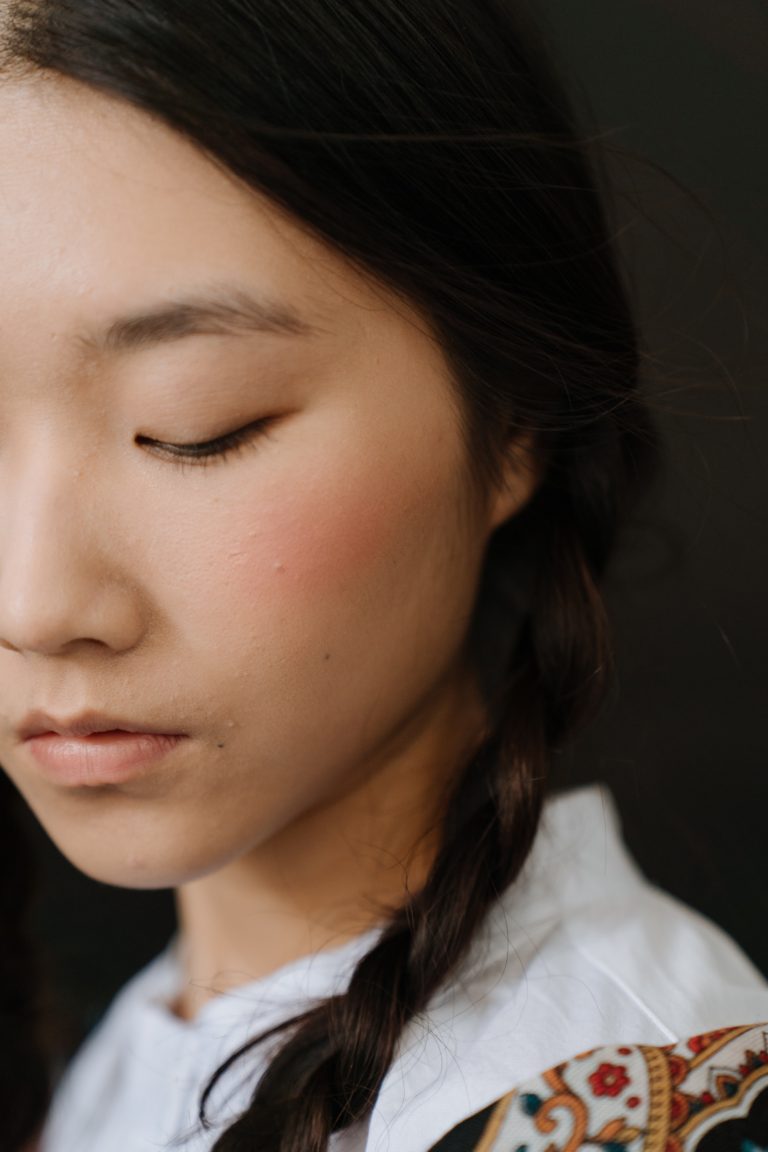
Applying blush traditionally involves blending it into the apples of your cheeks. (Unsure about its location? In the mirror, grin. Observe how the front portions of your cheeks rise when you grin. They are that.) Depending on the shape of your face, another blush location can look better.
Blush may be difficult since everyone’s faces have various sizes and shapes. Depending on the form of your face, you may wish to make the following adjustments:
Oval face
Try adding blush to the tops of your cheekbones if you have an oval face to give them a lifted appearance.
Round Face
Try putting blush just below the apples of your cheeks, along your cheekbones, and blending it upward toward the hairline to give your round face more definition.
Square Face
A splash of color on the apples of your cheeks helps to make faces seem bigger and naturally flushed. Applying on the apples of your cheeks may offer more volume to the cheek region if your face is more angular,
Heart-Shaped Face
Try applying blush in the form of a “C,” stretching from the top of your cheekbones to just above the end of your brows, to subtly soften the characteristics of a heart-shaped face (where you might be used to applying highlighter).
Step 6: Purée it
Although it’s typical to apply powder blush using a back-and-forth motion with the brush, you should always go back in and blend the color using circular movements so it seems more like a natural flush and less like color streaks.
Step 7: Add more color
You may be expecting for a little more pop once you’ve applied and blended it, or it may give the ideal natural appearance. Repeat this procedure until you get the cosmetic look you want, adding another layer if you want more color.
Blush Application Secrets
Here are a few secret beauty tricks you can do to ensure your blush looks its best now that you know how to apply it.
1.Always blush after applying bronzer
The timing of your blush application is just as crucial as the technique. Apply foundation and concealer after priming your face with a makeup primer and any other desired complexion products. Apply your bronzer next. In order to prevent the blush from “overpowering the face.”
2. To get a unified makeup appearance, stay within the same hue family
Use a cooler-toned blush, like a pastel pink or lilac, if using cold or warm hues on the eyes and lips, either use a coral or more peachy blush.
3.Use finishes to add your own unique touch
Should you choose a matte or sparkly color? The choice of finish depends mostly on personal taste and how it looks on your skin. If you often use foundations with a dewy finish, you may want to try a blush with a little sheen or shimmer. Matte blush may be more to your taste if you favor matte foundation.
4. Blush and full-coverage foundation are best friends
“The natural blush that most of us have in our cheek region will probably be cancelled out when you apply foundation. The quickest approach to restore color and warmth to your complexion is to add blush to your makeup regimen.
5. Add layers for extended wear
Do you want your blush to stay on all day and all night? The key is layering. For optimal wear, using a cream blush first, then setting it with a powder blush over top. Consider this method as a blush-specific setting powder. Your blush will retain its color and finish thanks to this, and it will look just as lovely at 11 p.m. as it did when you first applied it at 8 a.m.
6. Suppress any post-vacation glow
Apply blush over the nasal bridge and on the innermost portion of your cheekbones for a more sun-kissed appearance. You’ll get a sun-kissed appearance without being exposed to harmful UV rays since here is where the sun would normally shine on you.
Endnote
An excellent blush look needs a great and quality blush to make it. At Seny Beauty, we have one of the best blush production lines in China to cosmetic manufacturing with the most innovation and great quality. In the past, we have worked for over 100 brands in collaboration of producing blush products. Including Sigma, Florasis, Revolution Beauty and etc. Therefore, if you would like to handle the blush skills mentioned in this article or you want to create your own blush product which can achieve these effect when using, please contact us anytime!